
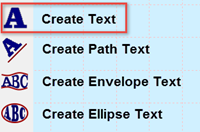
BuzzWord has four toolbar command buttons which can be used to create text of different styles. Most of these are pretty self explanatory - for example, click on the Create Path Text button and BuzzWord walks you through creating Path text. Instructions appear in the top of the work window so it is easy to remember exactly what you need to do. The same is true for Envelope Text and Ellipse Text.
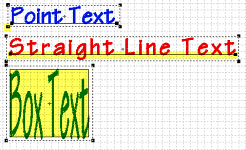
All three types of text are show above.
The point of reference for the text is
highlighted in yellow.
The main Create Text command doesn't provide any such instructions. Therefore, you may not know that this command can actually create three different flavors or types of text. These are point, line and rectangular (aka box) text.
The first, most obvious type of text you can create with the Create Text command is Point Text.
Point text is created just by clicking on a starting point in the work window. This option is great if you are creating several lines of text and you want them all to have the same aspect ratio. The height is set and adjusted from the Object Properties dialog (double-click on lettering to open the object properties dialog, then click on the Text tab).
With point text, some of the advanced text options are unavailable and are disabled on the advanced tab of the object properties dialog.
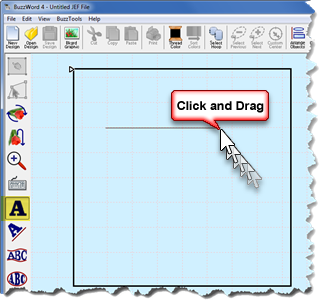
Straight line text is similar to point text because the lettering size and aspect ratio are determined by the height of the font. However, instead of just clicking, you enter into straight line mode by clicking and dragging a line. This is great because now you have a line as a reference which can be used to position the text.
On the advanced tab of the Text Properties dialog, the left, center, right, and justify alignments are available.
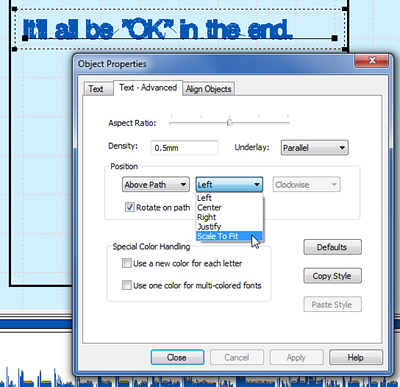
Notice how our example has room remaining on the right of the line? Well, we can justify our text just like in a document and the lettering would space out nicely to fill the available space - just like in the example at the top of the page. Also, on this drop down menu is the Scale to Fit command that changes the lettering size so that it fills the entire line and adjust the font height accordingly.
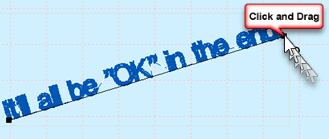
Another neat trick with both point and line text is that once you have entered your text, you can rotate the baseline by just clicking and dragging on one of its end nodes.If you try this, notice that dragging the end node of point text converts it into line text.
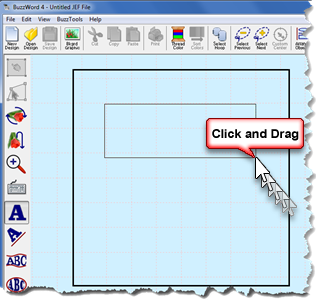
The last type of text you can create with the Create Text command is rectangular (or box) text.
Just click and drag a box the size needed for your lettering. This is great when you need text to fit in a specific location of your design.
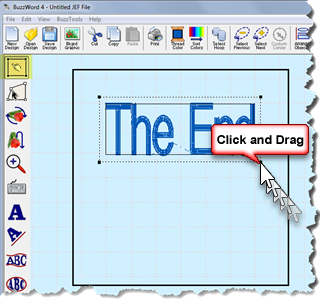
To resize box text, just click and drag one of the four selection nodes. In the latest update to BuzzWord, you can also take one of the corner selection nodes from point or line text and drag it to change your lettering to rectangular text!
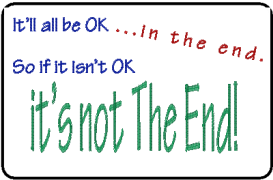
The finished design on the left includes all three types of text we just covered.
The point text is blue, the line text is red and the rectangular text is green. What can you
create!
FREE EMBROIDERY DESIGN DOWNLOAD If you would like a copy of this simple text design, it is available for Download it from our FaceBook page.