
In order to auto-digitize a design with a running stitch outline, you'll need a graphic with a thin, even width outline. If the outline is uneven or too thick, Buzz-2-Stitches will use a satin stitch outline as the program attempts to fill in what it thinks are details.
Note: We're using the Cartoon Style setting with
the "thin, even width outline" option which was made specifically for auto-digitizing running stitch outlines.

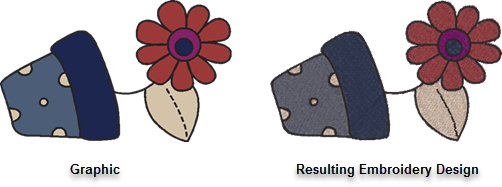
The graphic we are using in this tutorial is from Clipartopolis.com and it works well for auto-digitizing a design with a running outline because it contains a thin, even width outline - as long as we don't try to create too large of an embroidery design that is! When a graphic is enlarged, all areas of the art become taller and wider. In the case of an outline, this means that the outline will fatten - maybe even to the point that Buzz-2-Stitches can no create a running stitch outline.
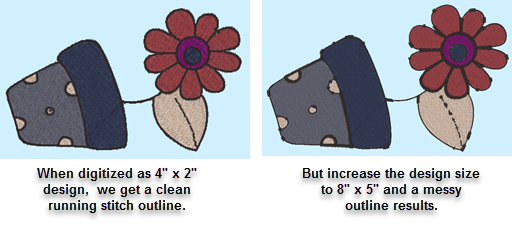
Compare the embroidery designs below. The design on the left was digitized at a size appropriate for the width of the outline. For the design on the right, we doubled the size of the design to illustrate how the outline is affected when a graphic is enlarged too much.
Need a bigger size? If you need the resulting embroidery in the larger size you have three choices.