When you get a new computer, you don't need to remap your custom fonts but you do need to move the fonts and mapping information to your new computer. Once there, the font information needs to be loaded into BuzzWord so that it can add the custom font to the list of available mapped design fonts.
When you create a custom font, you follow the wizard to choose the folder that contains all the letters (embroidery design files) for the font you want to map. The wizard then walks you through assigning keyboard letters and baselines to each embroidery design that is shown on the screen.
Without your knowing it, the program is saving all this information to a file inside that same folder. When you select the custom font to use, BuzzWord goes to that folder containing the designs and opens the map file you created. This provides BuzzWord with all of your mapping and baseline information. It's not magic but there is a lot going on behind the scenes.
First Copy the Entire Mapped Folder to the New Computer
Copy the ENTIRE folder containing the already mapped alphabet designs to the new computer. YES, if you have a folder called "Alphabets" that contains all of the folders that you have already mapped, you can move that entire folder (and subfolders) over to the new computer.
On Your New Computer
Once you have copied your font folders to your new computer, open the BuzzEdit 4 Toolkit with a new empty design. Then use View > Custom Stitch Fonts and click on the Add a custom font button.
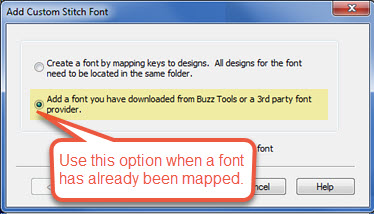
Click Next and the second screen gives you two options - to map a font (like you did on the old computer) OR to Add a font you have downloaded from Buzz Tools or a 3rd party font provider. Since you have the font.ini file already created and copied to this new computer, select this second option and click Next .
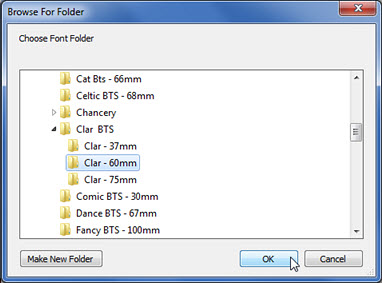
You are now prompted to navigate to the location of the alphabet you want to map. Select the folder and Click OK. This is similar to when you originally mapped the fonts but this time a busy bee displays as BuzzWord reads the information from the font.ini file.
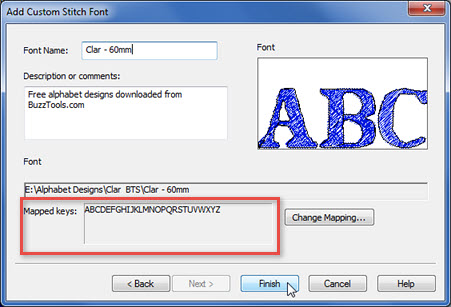
When the Add Custom Stitch Font dialog opens, the information from your previous work is displayed. The font name, description and all character maps are completely filled in. Click Finish to save the font to BuzzWord and add it to the list of mapped fonts.
Repeat this same quick process for all of the custom fonts you moved. Before long, you'll get all those fonts back into BuzzWord so that you can use them on your new computer.