
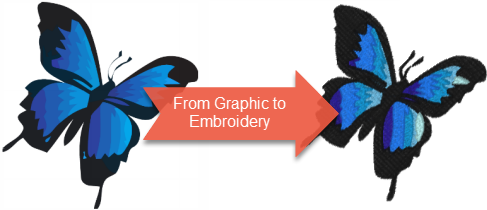
An auto-digitizing program has a HUGE job to do mostly on its own. The program has to analyze a bunch of colors, dots and shapes (your graphic) and recreate it in thread. Graphics don't contain information on sewing stitches, stitch sequences, needle downs or thread colors, so an auto-digitizing program must interpret a graphic and create these.
Graphics are made up of either pixels (raster or bitmap graphics) or filled shapes (vector graphics). The majority of camera pictures and computer graphics are bitmap graphics that contain over 256 thousand colors! Something that looks like one color to us, might actually contain thousands of subtle shades. This is what makes a graphic look good on our computers or in prints but we wouldn't want to change thread colors thousands of times.
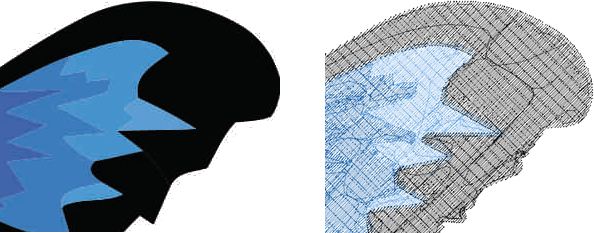
During the digitizing process, details must be combined and simplified, often by figuring out which colors belong together. Shapes made up of pixels must also be analyzed and combined until areas of stitching and colors can be defined. Some graphics are easier for the software to interpret and some are impossible due to too much (or not enough) information. In short, not all images are suitable for digitizing into embroidery designs.
Successful embroidery designs are designed to maximize the strengths of embroidery. When you create or look for graphics to use for embroidery, always keep in mind that the finished product will be sewn in thread.
Because your graphic will be recreated in actual threads, some images just won't work. Computer graphics and cameras do all sorts of things that are impossible with a needle and thread. For example, you can't stitch a transparency, or a subtle shade gradation. Other graphics may be too complex, too detailed, or contain lines that are too thin. This is true for both auto-digitized and manually digitized embroidery designs. Therefore, it's helpful to know what to look for when selecting or creating graphics for embroidery.
For more in-depth discussion of these topics, click on the included tutorial links.
The first thing you need to consider, is the type of graphics format you have available to you. Graphics files are generally classified as raster (bitmaps) or vector. Within each category, there are numerous file types which are just different ways of storing the graphic information.

Vector Graphics are images described by shapes such as circles, squares and lines. The shapes are precise mathematical descriptions of the image and can be scaled without becoming blurry. Common vector graphic formats include WMF, EMF and EPS. Choose vector graphics when possible as they produce the cleanest embroidery designs.
Vector graphics are similar to object based embroidery designs because they contain shapes and objects. Object based embroidery formats may also contain stitch information used by the embroidery machine but that isn’t always the case. Common object based embroidery machines include CND, GEN, and ART.
Raster Graphics are made of pixels which are basically tiny squares of color. Raster graphics cannot be resized beyond a certain limit or the images become fuzzy. Common raster graphic formats include BMP, GIF, TIFF and JPG. Scanned artwork and photos are always Raster Graphics.
Raster graphics formats are similar to stitch based embroidery designs because they don’t contain any objects. Common stitch based embroidery formats include HUS, SEW and DST.
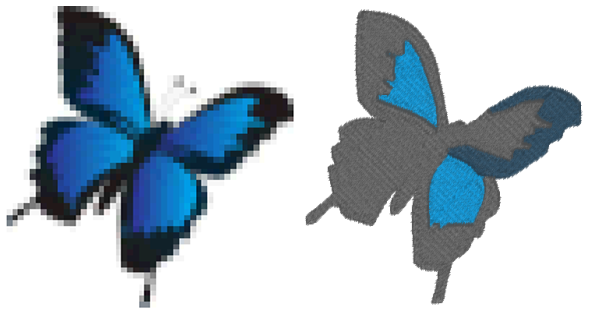
Avoid low resolution raster graphics because they pixelate when scaled upward and won't look good when auto-digitized. Too few pixels per inch will create a fuzzy looking image and too many pixels per inch will send too much information to the auto-digitizing engine. Usually if you see a fuzzy garbled image, you’ll get the same junk (or worse) out.
The optimal graphic size for raster images is between 150 pixels per inch (DPI) and 300 DPI. Your embroidery won’t look any better if you use an image larger than 300 DPI, since Buzz-2-Stitches resizes images that are too small or too large before processing them. This means if you are creating a 4" square embroidery design, you should be looking for a graphic that is between 600 to 1200 pixels square. It's safer to have too high a resolution graphic than too low a one as Buzz-2-Stitches does better with too much information than it does with too little. Learn more...
An auto-digitizing program such as Buzz-2-Stitches must interpret all of the colors in your graphic and make a decision as to what color pixels to group together. High resolution graphics may have thousands of colors even though it may appear to the naked eye to have only a few. If your graphic isn't auto-digitizing well, try reducing the number of colors in the graphic to 256 or less. Hand drawn artwork may need editing before they digitize well. Learn more...
Auto-digitizing software may combine similar colors in order to reduce colors and simplify images. Therefore, use graphics with good contrasting colors to represent unique areas of the design and consider changing colors in graphics to maximize contrast. After digitizing, you can always change thread colors to those more pleasing to you.

Choose images with clean, clearly viewable edges. Lines should be clearly visible and not blurred. When using raster graphics (such as bmp, gif, png or jpg formats), make sure your lines are at least 2 pixels wide or greater. Avoid thin outlines around objects whenever possible.

Gradients in images don’t work well for auto-digitizing. Try reducing all gradients to solid colors or select a different image.
Avoid color areas smaller than about a quarter inch or multiple colors in small areas. Embroidery cannot represent this level of detail well. Either enlarge the details or simplify the design by removing them from the source graphic.
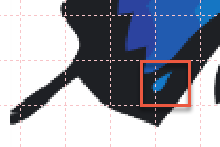
Not sure how small the details are in your graphic? First use the View > Preferences command and set a 2mm grid. Then prior to auto-digitizing your graphic, use the Background button or the File > Open Background Graphic to preview the image, setting it to the same size as the embroidery design you are creating. Small areas as the one shown, may be dropped and are better left off of the source graphic.
Hopefully, this overview has helped you to better evaluate graphics for auto-digitizing so that you can produce the best results from your auto-digitizing software. When you combine these tips with Buzz-2-Stitches excellent ability at interpreting a wide range of graphics, you'll quickly produce beautiful embroidery designs in no time.