
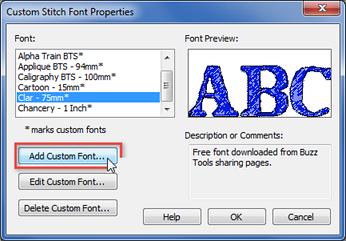
BuzzWord has the ability to use Quick Design fonts without mapping them. However, if you want your design font set up as a permanent custom font, you'll need to tell BuzzWord where to find them and which designs correspond with which key strokes. In order to be correctly defined by BuzzWord, each unique alphabet must be in its own folder. BuzzWord maps one keyboard character to one specific design so having two capital A’s, for example, in the same folder wouldn’t work.
If your font did not come with a pre-defined BuzzWord map file, you are going to need to set it up yourself. It takes only a few minutes and then the custom font will be available to you whenever you use BuzzWord.
Note: If you get a new computer, you won't need to remap all of your custom fonts. See Moving your BuzzWord Custom Fonts to a New Computer for more information.
To define a custom font, do the following:
The Add Font dialog
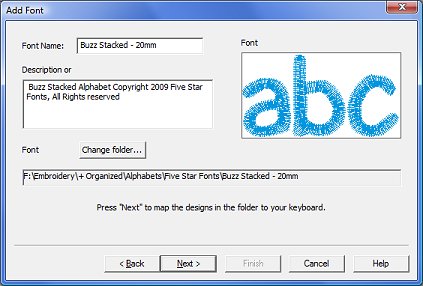
The Add Font dialog
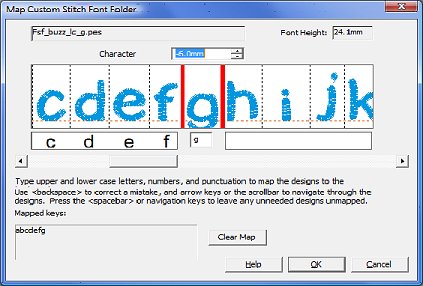
The Map Custom Font dialog
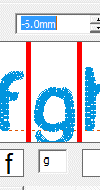
The baseline of the "g" is lowered
See how we have moved the lower case g down -6 mm so that it will appear correctly when later used. Take the time to make these important baseline adjustments now so that your custom stitch fonts look their very best.